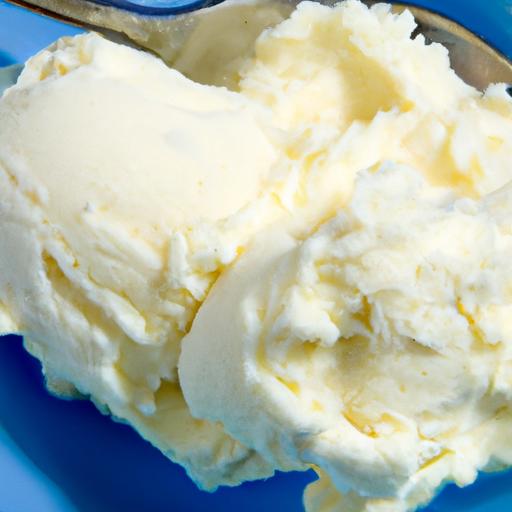
There’s a certain kind of magic in the simple scoop of vanilla ice cream-a creamy, dreamy delight that evokes nostalgia and pure joy with every bite. But what if you could unlock that magic yourself, right in your own kitchen? “Crafting Creamy Magic: Your Guide to Homemade Vanilla Ice Cream” is your passport to mastering this timeless classic.
From selecting the richest ingredients to understanding the delicate dance of churning and freezing, this guide will transform the art of making vanilla ice cream from a mere idea into a luscious, velvety reality. Whether you’re a curious beginner or a passionate home cook, prepare to embark on a tasty journey where science meets creativity-because homemade vanilla ice cream is more then dessert; it’s an experience waiting to be savored.
Crafting Creamy Magic: Your Guide to Homemade Vanilla Ice Cream
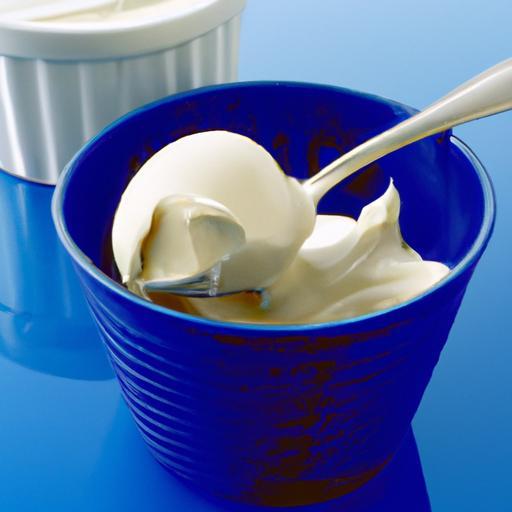
Crafting creamy magic with homemade vanilla ice cream is a timeless culinary adventure that captivates through it’s velvety texture and rich aroma. Originating from simple farmstead traditions, this delightful frozen treat has evolved into an artisanal masterpiece for home cooks and enthusiasts alike. The secret lies not just in the ingredients but in the finesse of preparing a custard base and the artful churning that transforms cream and eggs into silk.
Selecting the Perfect Ingredients for Silky Smooth vanilla Ice Cream
The journey to luscious homemade vanilla ice cream begins at the market, where the quality of your ingredients sets the foundation. Opt for fresh, high-fat cream and whole milk to ensure the richness and smooth mouthfeel that define true creaminess. when it comes to vanilla, a premium Madagascar Bourbon vanilla bean will elevate the flavor far beyond extract-its fragrant seeds mixed into your custard will infuse every bite with pure indulgence. Fresh, organic eggs are pivotal, providing that natural custard thickness that synthetic stabilizers simply cannot replicate.
Prep and Cook time
- Preparation: 20 minutes
- cooking (custard base): 15 minutes
- Chilling time: Minimum 4 hours (preferably overnight)
- Churning and freezing: 30-40 minutes + 2 hours firming
Yield
Approximately 1 quart (4 cups) of rich, homemade vanilla ice cream-perfect for 6 generous servings.
Difficulty Level
medium: Requires attention during custard cooking and patience during chilling and churning, but yields exceptional results.
Ingredients
- 2 cups heavy cream, cold
- 1 cup whole milk, cold
- ¾ cup granulated sugar
- 5 large egg yolks, preferably organic
- 1 whole Madagascar Bourbon vanilla bean (or 2 tsp high-quality vanilla extract)
- A pinch of fine sea salt
Mastering the Art of Custard Base Cooking for ultimate Creaminess
- Split the vanilla bean lengthwise and scrape out the seeds using the back of a knife. Set seeds and pod aside.
- In a medium saucepan, combine milk, cream, half the sugar, and the scraped vanilla seeds along with the pod. Warm the mixture over medium heat, stirring occasionally until small bubbles form around the edges-do not boil.
- While the milk mixture heats, whisk together egg yolks and remaining sugar in a heatproof bowl until pale and thickened.
- Remove the vanilla pod from the warm cream mixture. Slowly pour approximately one-third of the warm cream into the yolks, whisking constantly to temper the eggs and avoid curdling.
- Pour the tempered yolk mixture back into the saucepan with the remaining cream. Cook over low heat,stirring constantly with a wooden spoon or silicone spatula,scraping the pan’s bottom to prevent sticking.
- Cook until the custard thickens and coats the back of the spoon-this should register about 170°F on an instant-read thermometer. Avoid overheating to prevent scrambling.
- Promptly pour the custard through a fine mesh sieve into a clean bowl to ensure smoothness.
- Allow the base to cool to room temperature,then cover with plastic wrap directly on the surface to prevent a skin from forming. Chill in the refrigerator for at least 4 hours or overnight for best results.
Churning Techniques and tips to Achieve Irresistible Texture
With the custard perfectly chilled, transferring it to your ice cream maker is where creamy magic really takes shape. Remember, cold base equals better texture-everything should be as cold as possible.
- Pour the chilled custard into your ice cream maker bowl (pre-frozen according to manufacturer instructions).
- Churn for 30-40 minutes until the mixture doubles in volume and reaches a soft-serve consistency. Pay attention to the signs of thickening but avoid over-churning, which can cause ice crystals.
- Once churned, transfer the ice cream to an airtight container. For firm texture, freeze for an additional 2 hours before serving.
- For an ultra-smooth scoop, allow the ice cream to sit at room temperature for 5 minutes before serving.
Creative Twists and Serving Suggestions to elevate Your Homemade Treat
Once you’ve mastered the classic base, indulge your creativity by folding in a handful of toasted chopped nuts, swirls of caramel, or bursts of fresh berries after churning. Pairing homemade vanilla ice cream with a warm fruit cobbler or rich chocolate sauce creates irresistible contrasts.
Presentation can turn simple ice cream into an elegant dessert. Serve in chilled bowls with delicate edible flowers, a sprinkle of flaky sea salt, or a dusting of cinnamon for subtle complexity. A crisp tuile cookie or homemade waffle cone adds that final touch of charm and texture.
Chef’s Notes: Tips for Success
- Ingredient Quality: Investing in top-tier vanilla and fresh dairy products will shine through every spoonful.
- Patience is key: never rush chilling stages; they guarantee the creamiest texture.
- custard Tips: use a thermometer for precise cooking and stir constantly to avoid lumps.
- Storage: Press a layer of parchment paper or plastic wrap directly onto the ice cream surface before closing to inhibit crystals.
- Variations: Replace vanilla bean with a teaspoon of ground cinnamon or lemon zest in the milk for a seasonal twist.
Serving Suggestions
- Serve scoops atop warm baked fruits such as apple or peach cobbler for contrast between hot and cold.
- Drizzle with a quick homemade chocolate ganache or salted caramel sauce.
- Create an elegant parfait layering ice cream with crushed biscotti and fresh berries in tall glasses.
- Pair with espresso for an affogato-style treat.
| Nutrient | Per Serving (¼ cup) |
|---|---|
| Calories | 190 kcal |
| Protein | 3 g |
| Carbohydrates | 18 g |
| Fat | 12 g |

For more insights into perfecting classic custards, visit our internal guide on Perfect Custard Techniques. To deepen your knowledge on vanilla varieties and sourcing, check the Vanilla Queen’s authoritative vanilla facts.
Q&A
Crafting Creamy Magic: Your Guide to Homemade Vanilla Ice Cream – Q&A
Q1: What makes homemade vanilla ice cream diffrent from store-bought varieties?
A1: Homemade vanilla ice cream captures the essence of freshness in every scoop. Unlike store-bought versions, which may contain preservatives and stabilizers, homemade ice cream is a pure festivity of simple ingredients-cream, sugar, eggs, and vanilla-crafted with care. the texture is creamier, the flavor more vibrant, and every batch is a personal masterpiece.
Q2: Can I make vanilla ice cream without an ice cream maker?
A2: Absolutely! while an ice cream maker helps create a smooth, churned texture by incorporating air, you can achieve delightful results by hand. One popular method involves freezing the ice cream base in a shallow container and stirring vigorously every 30 minutes to break up ice crystals. It takes a bit more elbow grease but yields wonderfully creamy results.
Q3: What type of vanilla is best for homemade ice cream?
A3: The soul of your vanilla ice cream lies in the vanilla itself. Madagascar Bourbon vanilla beans are prized for thier rich, sweet, and mellow flavor, making them a top choice. However, pure vanilla extract or vanilla bean paste can also deliver lush and aromatic notes. Using real vanilla beans, with their tiny black seeds, adds a stunning speckled appearance and intensified flavor.
Q4: How vital are egg yolks in the recipe? Can I skip them?
A4: Egg yolks act as natural emulsifiers,creating the luscious,custardy texture that characterizes classic vanilla ice cream. Skipping them leads to a lighter, icier texture, more like a frozen custard alternative. If eggs aren’t your preference, you can explore eggless recipes using cream and stabilizers like cornstarch, but expect a slightly different mouthfeel.
Q5: How do I prevent ice crystals and keep ice cream smooth?
A5: The secret lies in the art of churning and the balance of ingredients. Churning helps incorporate air and breaks up ice crystals as they form during freezing. Using a higher fat content (like heavy cream) and sugar also lowers the freezing point, helping keep the texture creamy. Patience is key-freeze your base thoroughly between churns or stirs for the best silky consistency.
Q6: Can I customize my vanilla ice cream with mix-ins?
A6: Definitely! Vanilla ice cream is the perfect canvas for creative additions-from swirls of homemade caramel or fruit preserves to crunchy nuts and chocolate chunks. Add your mix-ins near the end of churning or fold them in just before the final freeze to keep them evenly distributed and deliciously fresh.
Q7: what’s the best way to store homemade ice cream?
A7: Store your ice cream in an airtight container to protect it from freezer burn and unwanted odors. Press a layer of parchment paper directly onto the surface before sealing to keep it extra fresh.For the creamiest texture, allow the ice cream to sit at room temperature for a few minutes before scooping-this softens it just enough to bring out its luscious depth.
Q8: Is it possible to make a lighter version of vanilla ice cream?
A8: Yes! Swap out some heavy cream for whole milk to reduce fat but maintain creaminess. Using a bit less sugar also lightens the base. Keep in mind, lighter versions may have a less rich mouthfeel and freeze harder, so letting the ice cream soften a bit before serving helps.
Q9: How long does homemade vanilla ice cream typically last in the freezer?
A9: For the best flavor and texture, aim to consume your homemade vanilla ice cream within 1 to 2 weeks. After that, it can start to develop ice crystals and lose its creamy magic.Always store it properly in airtight containers for maximum shelf life.
Q10: Any tips for perfect vanilla ice cream every time?
A10: Yes! Use high-quality ingredients-real vanilla, fresh cream, and farm-fresh eggs if possible. Be patient during the freezing process and don’t rush the chilling step before churning; a cold base churns into creaminess much more easily. don’t be afraid to experiment-the best vanilla ice cream is the one made just the way you like it!
The Conclusion
As the final swirl melts into the first heavenly spoonful, you realize that homemade vanilla ice cream is more than just a dessert-it’s a canvas for creativity and a celebration of simple, pure flavors. Armed with this guide, you now hold the keys to crafting creamy magic right in your own kitchen. Whether you choose to savor it plain or dress it up with your favorite toppings, each bite promises a taste of indulgence made with love and care. So go ahead, churn your way to bliss, and let your vanilla ice cream journey be as rich and comforting as the dessert itself.