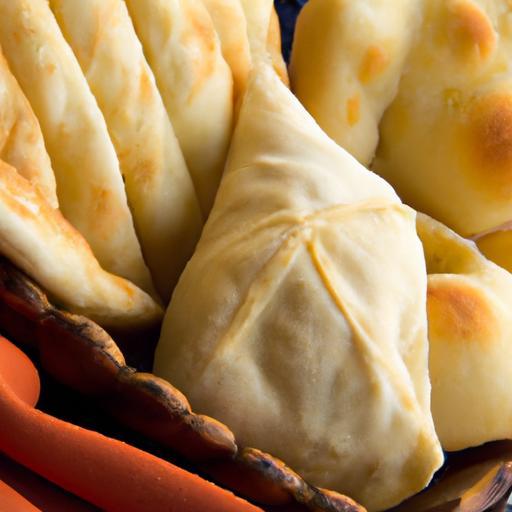
There’s something truly magical about the simple,pillowy goodness of a perfectly puffed pita fresh from the oven. This ancient bread, with its soft, airy pocket and golden crust, has been a staple across cultures for centuries – and for good reason. Mastering the art of homemade pita opens up a world of culinary possibilities: from stuffing it with vibrant fillings to tearing it into warm, flaky pieces for dipping. In this ultimate guide, we’ll unravel the secrets behind that coveted puff, sharing techniques, tips, and foolproof recipes that transform basic ingredients into a bakery-worthy masterpiece. Whether you’re a seasoned baker or a curious kitchen adventurer, get ready to elevate your bread game and fill your home with irresistible aromas and delightful bites. Welcome to your perfect pita journey!
Perfectly Puffy Pita starts with selecting the right flour and yeast-key players that unlock the soft, airy texture and that signature puffed pocket we all crave. This beloved Middle Eastern flatbread,with its golden hue and pillowy bite,transforms humble ingredients into something truly enchanting at home. Whether it’s your first time crafting pita or you’re refining your baking prowess, understanding dough hydration, resting times, and baking technique will elevate your game from basic to bakery-worthy.
Prep and Cook Time
- Preparation: 15 minutes
- Resting & Proofing: 1 hour 30 minutes
- Cooking: 10 minutes
- Total Time: Approximately 1 hour 55 minutes
Yield
8 medium-sized pitas
Difficulty Level
Medium – Ideal for bakers ready to master hydration and proofing for perfect pockets.
Ingredients
- 2 cups bread flour, sifted
- 1 cup all-purpose flour, sifted
- 1 ¼ cups lukewarm water (about 105°F/40°C)
- 2 tsp active dry yeast
- 1 tsp sugar or honey
- 1 tbsp olive oil
- 1 ½ tsp fine sea salt
Instructions
- Activate the yeast: In a small bowl, combine lukewarm water, sugar, and active dry yeast. Stir gently and let it rest for 8-10 minutes until bubbly and foamy. This indicates the yeast is alive and ready.
- Mix flours and salt: In a large bowl, whisk together bread flour, all-purpose flour, and salt. This blend balances strong gluten advancement with a tender crumb-key for perfectly puffy pita.
- Combine ingredients: Pour the yeast mixture and olive oil into the flours. Stir with a wooden spoon or dough hook attachment until a shaggy dough forms.The hydration should feel tacky but not sticky; add a teaspoon more water or flour if needed.
- Knead the dough: On a floured surface, knead vigorously for about 8-10 minutes until smooth and elastic.Proper gluten development here creates the stretch needed for puffing.
- First rise: Form the dough into a ball, lightly oil the bowl, and cover it with a clean cloth. Let it rise in a warm place for 1 hour or until doubled in size, allowing gluten to relax and flavors to deepen.
- Divide and shape: Punch down the dough gently, than divide into 8 equal portions.Shape each into a smooth ball and let rest for 10 minutes – this resting time is crucial for elasticity without shrinkage during baking.
- Roll out the discs: Using a rolling pin,roll each ball into a circle about ¼ inch thick. Avoid pressing too hard; even thickness ensures uniform puffing.
- Preheat the oven and baking surface: Place a baking stone or heavy-duty baking sheet in the oven and preheat to 475°F (246°C). The intense heat mimics traditional pita ovens, creating the steam needed for puffing.
- Bake the pitas: Carefully transfer 2-3 discs onto the hot surface.Bake for 2-3 minutes, watching for puffing bubbles. Flip and bake another 1-2 minutes until golden brown but still soft.
- Cool and serve: Remove baked pita and cover with a kitchen towel to keep them soft and warm. Repeat with remaining dough.
Chef’s Notes: Tips for Success
- Flour selection: Bread flour’s higher protein content (gluten) is essential for that bounce and pocket formation. Mixing a moderate amount of all-purpose flour softens the crust for approachable chewiness.
- Yeast choice: Active dry yeast gives you control over fermentation times. Instant yeast can speed up the process but may affect flavor depth slightly.
- dough hydration: Adjust water carefully-the dough should be sticky enough to allow expansion but not so wet it’s unmanageable.
- Rest periods: Don’t skip the 10-minute ball rest before rolling-it greatly helps in shaping and puffing.
- Oven temperature: A scorching hot oven is the secret weapon for creating steam inside the dough, pushing it to puff perfectly.
- troubleshooting common issues: Flat or no puff usually means your oven isn’t hot enough, dough was rolled unevenly, or the dough did not rest sufficiently.
- Make ahead: Dough can be refrigerated overnight after the first rise-bring back to room temp and punch down before shaping for convenience without losing puffiness.
Serving Suggestions
The magic of perfectly puffy pita shines when served warm, stuffed with vibrant fillings like grilled veggies and creamy hummus, or torn and dipped in zesty tzatziki. Garnish with fresh herbs such as mint or parsley, and sprinkle with sesame or nigella seeds for a visual and textural feast. Try pairing pitas with a bright fattoush salad or slivers of spiced chicken for a truly authentic experience. Store leftovers in an airtight container-reheat wrapped in foil for softness.

| Nutrient | Per Pita (Approx.) |
|---|---|
| Calories | 150 |
| Protein | 5g |
| carbohydrates | 30g |
| Fat | 2g |
learn more about complementary dips and spreads to accompany your homemade pitas. For additional insights on yeast fermentation and dough hydration, visit the King Arthur Baking’s Bread Science Guide.
Q&A
Q&A: Perfectly Puffy Pita: your Ultimate homemade Bread Guide
Q1: What makes pita bread “perfectly puffy”?
A1: That iconic puff happens because of a high baking temperature combined with well-proofed dough. As the dough hits the heat, steam forms inside, causing the layers to separate and create that hollow pocket we love. Achieving the right balance of moisture,gluten development,and oven heat is key!
Q2: Can I use regular all-purpose flour for pita,or do I need bread flour?
A2: While bread flour’s higher protein content helps create a chewier texture and better puff,all-purpose flour works just fine for homemade pita if you knead thoroughly. Just keep in mind that bread flour gives an edge in elasticity and structure, especially for beginners.
Q3: How significant is the resting and proofing time for pita dough?
A3: Crucial! Resting lets the gluten relax and helps the yeast create carbon dioxide, which contributes to that beautiful rise.Rushing this step can result in dense, flat pita without pockets. Ideally, proof your dough until it roughly doubles in size-patience really pays off.
Q4: What’s the best way to bake pita at home without a professional oven?
A4: A super-hot cast iron skillet or heavy baking stone in your oven works wonders. Preheat your cooking surface until it’s scorching hot-around 500°F (260°C)-then slap the rolled dough onto it. This high heat replicates traditional baking environments, encouraging that perfect puff.Q5: Can I freeze homemade pita bread?
A5: Definitely! Freeze fully cooled pitas in an airtight bag, separating layers with parchment if you like. When you want to enjoy them, thaw at room temperature and warm them briefly in a hot pan or oven to regain that fresh-from-the-oven softness.
Q6: What variations can I try to elevate my homemade pita?
A6: Incorporate herbs like za’atar, fresh thyme, or rosemary into your dough for aromatic flair. Swirling in spices like cumin or smoked paprika can add warmth.Alternatively, brush the pitas with garlic-infused olive oil post-baking for an irresistible flavor boost.Q7: How can I tell if my pita pockets are properly cooked?
A7: Perfect pitas will have a golden exterior with puffed centers forming visible pockets. A slightly crisp outside and a soft, chewy interior mean you’ve nailed the bake. If the pockets don’t puff, but the bread is cooked through, it’s usually a sign to adjust temperature or proofing next time.
Q8: Is pita bread healthy and how does it compare to other flatbreads?
A8: pita is relatively low in fat and calories and serves as a great source of carbohydrates and protein when made with whole wheat flour or enriched blends. Compared to other flatbreads, its pocket design makes it ideal for controlled portions and easy fillings-perfect for meals or snacks packed with veggies and plant-based proteins.
Q9: Can I make pita dough without yeast?
A9: Traditional pita relies on yeast for that signature rise and flavor, but rapid versions use baking powder or baking soda as leaveners. These won’t produce the same puff or chewiness but are a good option when time is tight.for authentic puffing,yeast is your best bet.
Q10: What’s the secret to rolling out pita dough evenly?
A10: Lightly flour your surface and rolling pin, roll from the center outward, and rotate your dough frequently. Aim for uniform thickness-about 1/8 inch-so heat spreads evenly, encouraging consistent puffing across each pita. Too thick or thin will affect texture and pocket formation.
Ready to roll, bake, and wow your taste buds with your own puff-perfect pita? Your journey to homemade bread bliss starts here-one soft, fluffy pocket at a time!
Future Outlook
With every warm, pocketed pita fresh from your oven, you’re not just baking bread-you’re crafting a culinary experience that’s as versatile as it is satisfying. Armed with these tips and techniques, your homemade pitas will rise to fluffy perfection, ready to cradle your favorite fillings or accompany dips with effortless charm. So roll up your sleeves, embrace the dough’s gentle stretch, and let your kitchen fill with the irresistible aroma of perfectly puffy pita-because the ultimate homemade bread isn’t just a recipe, it’s a delicious journey waiting to unfold.