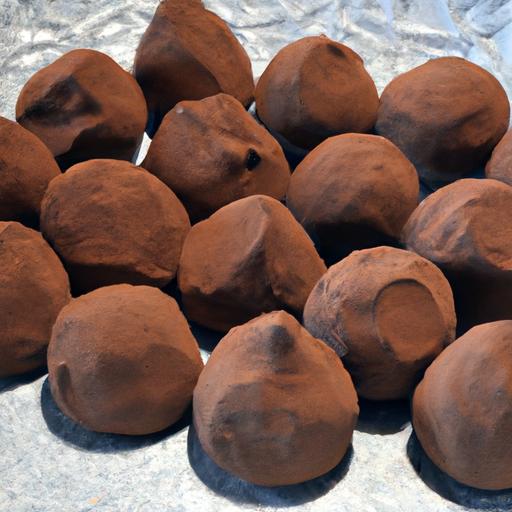

There’s something irresistibly enchanting about a bite of rich, velvety chocolate truffles-those little morsels of pure indulgence that melt smoothly on the tongue and leave a lingering whisper of cocoa bliss. While they might seem like a delicacy reserved for fancy patisseries or special occasions, making decadent homemade chocolate truffles is actually a delightful and approachable craft you can master in yoru own kitchen. In this step-by-step guide, we’ll unravel the secrets behind creating these sumptuous treats from scratch, transforming simple ingredients into luscious treasures. Get ready to embark on a flavorful journey where creativity meets precision, and every truffle becomes a personal masterpiece of melt-in-your-mouth luxury.
Decadent homemade chocolate truffles are a sublime indulgence that transforms simple ingredients into velvety morsels of luxury.Each bite offers a melt-in-your-mouth experience that transcends ordinary desserts, perfect for gifting or savoring on special occasions. Rooted in European confectionery traditions, these truffles marry the rich intensity of fine chocolate with the silky decadence of expertly mastered ganache-a divine center that dances on the palate.
Prep and Cook Time
- Planning: 25 minutes
- Chilling: 3 hours (or overnight for best results)
- Total Time: Approximately 3 hours 30 minutes
Yield
About 24 truffles, depending on your preferred size
Difficulty Level
Medium - approachable by eager home cooks and perfect for those looking to elevate their chocolate-making skills
Ingredients
- 8 oz (225 g) high-quality dark chocolate (70% cocoa), finely chopped
- 1/2 cup (120 ml) heavy cream, preferably fresh and cold
- 2 tbsp (30 g) unsalted butter, cut into small cubes
- 1 tsp pure vanilla extract or a splash of espresso for depth
- Cocoa powder, finely chopped nuts, or edible gold dust for coating
- Optional: 1/2 tsp sea salt flakes for finishing
instructions
- prepare the ganache base: Place the finely chopped dark chocolate in a heatproof bowl. In a small saucepan, gently heat the heavy cream until it just begins to simmer; do not boil. Pour the hot cream over the chocolate, allowing it to sit undisturbed for 2-3 minutes to soften the chocolate.
- Achieve a smooth texture: Using a rubber spatula, stir gently starting from the center and expanding outward in slow circles until the ganache is glossy and completely smooth. This slow mixing ensures silky perfection without incorporating air bubbles.
- Incorporate butter and flavour: Add the unsalted butter and vanilla extract (or espresso) to the ganache. Stir continuously until fully combined, enriching the texture and intensifying the flavor. For a boozy choice, a tablespoon of high-quality liqueur such as Grand Marnier or hazelnut can be added here.
- Chill the ganache: Cover the bowl with plastic wrap and refrigerate for at least 3 hours, or until the ganache becomes firm enough to scoop but still pliable.
- Shape your truffles: Using a teaspoon or melon baller, scoop small rounds of ganache and quickly roll between your palms to form smooth spheres. To prevent hands from melting the chocolate too rapidly, consider wearing disposable gloves or dipping your hands briefly in cold water.
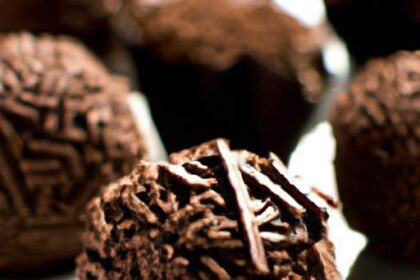
- Coat with creativity: Roll each truffle in your chosen coating-whether a dusting of rich cocoa powder, finely chopped toasted nuts, or a shimmering edible gold dust. For a contrasting crunch, try toasted coconut flakes or crushed freeze-dried raspberries.
- Final chill and serve: Place the coated truffles on a parchment-lined tray and refrigerate for another 30 minutes to set. Serve chilled or at room temperature, allowing the ganache to slightly soften and reveal its luxurious smoothness.
Expert Tips for Mastering the Art of Ganache and Truffle Perfection
- Choose chocolate with care: The foundation of decadent homemade chocolate truffles is high-quality dark chocolate with at least 70% cocoa. This guarantees a rich, intense flavor and smooth mouthfeel.
- Temperature control: Avoid overheating the cream or chocolate. Scalding cream should never boil to preserve its delicate fats, ensuring a silky ganache.
- Flavor infusions: Infuse cream with fresh herbs like mint or lavender by warming it gently with the herbs, then straining before mixing. Citrus zest or spices like cinnamon can also add layers of intrigue.
- Chocolate tempering (optional): If coatings require a glossy finish, temper your chocolate separately to avoid streaky or dull truffles.
- Storage: Truffles keep beautifully in an airtight container in the refrigerator for up to two weeks or frozen for up to three months. Bring to room temperature before serving.
Serving Suggestions to Elevate Your Truffle Experience
Present your chocolate truffles nestled in petite paper cups on a crystal or porcelain platter. For festive occasions, scatter fresh edible flowers or sprinkle a light dusting of powdered sugar for a snow-kissed effect. Pair with bold espresso or a glass of dark, fruity red wine such as Pinot Noir (non-pork) for luxurious tasting moments. A side of house-made whipped cream infused with a hint of orange zest will enchant any guest.

| Nutrient | Per Truffle (approx.) |
|---|---|
| Calories | 90 kcal |
| Protein | 1 g |
| carbohydrates | 7 g |
| Fat | 7 g |
Explore more on optimizing chocolate quality for desserts to deepen your confectionery craft. For detailed details on chocolate sourcing and health benefits, visit Cacao Health Institute.
Q&A
Q&A: Decadent Homemade chocolate Truffles – Your Step-by-Step Guide
Q1: What makes homemade chocolate truffles different from store-bought ones?
A: Homemade chocolate truffles boast an unparalleled freshness and personal touch. Unlike many store-bought varieties that rely on preservatives or mass production methods, homemade truffles allow you to control every ingredient-resulting in a richer, creamier experience that melts like velvet on your tongue.
Q2: What basic ingredients do I need to make chocolate truffles?
A: The core trio for classic truffles includes high-quality dark chocolate, heavy cream, and butter. these simple ingredients combine to create a ganache that’s silky and luscious. From there, you can add flavors or coatings to make the truffles uniquely yours.
Q3: Is it essential to use dark chocolate, or can I use milk or white chocolate?
A: While dark chocolate is preferred for its deep, intense flavor and firm texture, milk and white chocolates can absolutely be used for sweeter, creamier truffles. Just keep in mind they may require slight adjustments in cream amount since their fat and sugar contents differ.
Q4: How do I achieve the perfect ganache consistency for rolling?
A: The key is gently heating the cream until just simmering, then pouring it over chopped chocolate. Let it sit without stirring for a minute so the chocolate melts evenly, then stir slowly until smooth. Once the ganache cools and firms up in the fridge-usually 1-2 hours-it becomes the perfect pliable texture for scooping and rolling.
Q5: What are some creative coatings or garnishes I can use?
A: The canvas is wide open! Classic options include cocoa powder, finely chopped nuts, toasted coconut, or powdered sugar. For a twist, try matcha powder, crushed freeze-dried fruits, chili flakes for a spicy kick, or a dusting of edible gold powder for that extra luxe flair.
Q6: Can I store homemade truffles,and if so,how long do they stay fresh?
A: Yes! Truffles should be stored in an airtight container in the refrigerator,where they’ll stay fresh for about 1 to 2 weeks. Before serving, allow them to come to room temperature for that soft, melt-in-your-mouth texture.
Q7: Are there any tips to make shaping the truffles easier?
A: Absolutely. Keep your hands slightly cool by refrigerating them briefly or wetting them lightly with water. Use a small cookie scoop or melon baller to portion the ganache evenly before rolling between your palms. If the ganache becomes too soft while you work, a fast chilling session will firm it up again.
Q8: Can truffles be made vegan or dairy-free without sacrificing texture?
A: Yes! Replacing heavy cream with coconut cream or a plant-based alternative and using dairy-free chocolate can yield creamy vegan truffles. Tho textures vary slightly, experimenting with ratios will help you nail that decadent, smooth consistency.
Q9: How long does the entire truffle-making process take for beginners?
A: From start to finish, expect about 2 to 3 hours, factoring in chilling time for the ganache. While the process is simple, patience is your best ingredient for luscious results that are truly worth the wait.
Q10: What’s the best way to present homemade chocolate truffles as gifts?
A: Presentation adds magic! Place truffles in decorative boxes or mini cupcake liners, and tie with a ribbon or personalized tag. Keeping them chilled until gifting preserves their perfection, and homemade notes or recipe cards add a heartfelt touch that recipients will treasure.
Closing remarks
As you wrap up your decadent homemade chocolate truffle journey, remember that each velvety bite is a testament to the simple magic of quality ingredients and a touch of patience. Whether gifting these luscious morsels or indulging in a quiet moment of self-love, your handcrafted truffles carry a story of creativity and care. So, don your apron, savor the process, and let these silky delights transform any ordinary day into a celebration of chocolate’s timeless allure. Happy truffle-making!