Ther’s somthing undeniably magical about the humble lavash-a thin, tender flatbread that has journeyed across centuries and cultures, wrapping stories and flavors within its delicate folds. Whether you’re savoring it alongside a hearty stew, rolling it up with vibrant fillings, or simply enjoying its warm, pillowy texture straight from the oven, mastering lavash opens the door to a world of culinary tradition and creativity. In this step-by-step bread recipe guide, we’ll unravel the art of crafting perfect lavash at home, sharing tips, techniques, and secrets that transform simple ingredients into a masterpiece of taste and texture. Ready to roll up your sleeves and bake your way to authentic lavash? let’s get started.
mastering Lavash begins with selecting the freshest, most authentic ingredients that pay homage to this ancient Armenian flatbread’s roots. Originating from the Caucasus region, lavash is cherished for its delicate softness and pliable texture, perfect for wrapping or enjoying alongside hearty stews and dips. Using high-quality components transforms the process from mere baking into a soulful experience, connecting you to centuries-old traditions. Let’s explore how to choose the finest ingredients, the art of kneading for that signature softness, and techniques to roll and bake lavash flawlessly.
Prep and Cook Time
- Readiness: 15 minutes
- Resting and Proofing: 1 hour 30 minutes
- Baking: 5-7 minutes per batch
- Total Time: Approximately 2 hours
Yield
Makes 8-10 soft and flexible lavash breads, perfect for sharing at family meals or gatherings.
Difficulty Level
medium – A rewarding challenge suited for home bakers familiar with dough work who want to elevate their bread craft.
Ingredients
- 3 ½ cups all-purpose flour, sifted
- 1 cup lukewarm water (110°F/43°C)
- 1 teaspoon fine sea salt
- 1 teaspoon active dry yeast
- 1 tablespoon honey or natural sugar
- 2 tablespoons extra virgin olive oil (plus extra for brushing)
Instructions
- Activate the yeast: in a small bowl, combine lukewarm water, honey, and yeast.Stir gently and let it sit for 5-7 minutes until frothy, signaling the yeast is alive and kicking.
- Mix dry ingredients: In a large mixing bowl, whisk together the sifted flour and sea salt ensuring even distribution.
- Combine and knead: Pour the yeast mixture and olive oil into the flour. Mix with your hands or a dough hook attachment on low speed until a shaggy dough forms.
- Kneading technique: Transfer dough to a lightly floured surface. Using the heels of your hands, push the dough away, then fold it back towards you. Rotate the dough and repeat for 10 minutes until the dough feels soft, elastic, and slightly tacky but not sticky. This kneading method develops gluten strands essential for the bread’s flexible texture.
- First proof: Shape the dough into a ball and place it in a lightly oiled bowl, turning once to coat. Cover with a damp cloth or plastic wrap. Let it rise in a warm place for 1 hour or until it doubles in size.
- Divide and shape: Punch down the dough gently and divide it into 8-10 equal portions.Roll each portion into a smooth ball, then cover with a kitchen towel and rest for 10 minutes to relax the gluten.
- Rolling artfully: On a lightly floured surface, use a rolling pin to roll each ball out into a large, ultra-thin oval or circle about 10-12 inches wide. The goal is to achieve paper-thin dough without tearing; rolling from the center outward helps maintain uniform thickness.
- Baking lavash: Preheat your oven to 500°F (260°C), placing a baking stone or inverted heavy baking sheet inside to heat thoroughly. Transfer rolled lavash to a peel or parchment paper and slide it onto the hot surface. Bake for 5-7 minutes or until the edges begin to crisp and bubbles appear on the surface. Lavash should remain flexible, not dry or overly browned.
- Cooling and storing: Remove from oven and promptly cover with a clean, dry kitchen towel to retain moisture and softness. Repeat with remaining dough portions.
Chef’s Notes: Tips for Success
- Flour choice: While all-purpose flour works well, for a more authentic texture, combine with a small portion of whole wheat flour or bread flour to add depth and a slight chew.
- Hydration: The dough should be soft but manageable. If too sticky, dust with more flour sparingly during kneading and rolling.
- Resting matters: Don’t rush the gluten relaxation phase; it prevents tearing during rolling.
- Baking habitat: A baking stone mimics traditional tandoor baking and ensures evenly distributed heat for perfect dough advancement.
- Make-ahead: Lavash freezes wonderfully. Stack cooled breads between parchment paper and freeze in airtight bags. Reheat briefly on a hot skillet or oven before serving.
Serving Suggestions
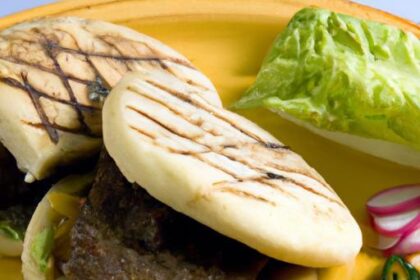
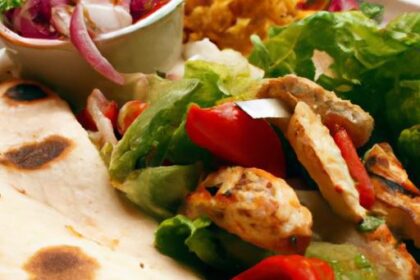
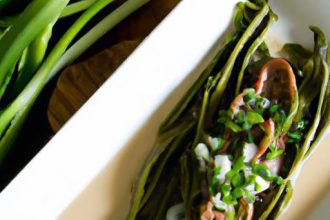
Lavash is a beautiful canvas awaiting your culinary creativity. Serve it warm wrapped around grilled meats, fresh herbs, or creamy cheeses. Garnish with a generous brushing of olive oil and a sprinkle of za’atar or nigella seeds for an aromatic touch. It pairs exquisitely with dips like hummus, baba ganoush, or labneh. Try tearing pieces to scoop up vibrant Mediterranean salads or use lavash as a base for flatbread pizzas topped with roasted vegetables and fresh tomatoes.

| Nutrient | Per Lavash (approx.) |
|---|---|
| Calories | 120 kcal |
| Protein | 4 g |
| Carbohydrates | 22 g |
| Fat | 2 g |
For more insights on traditional bread baking techniques, check out our Artisanal Bread Baking Tips. For detailed background on lavash’s cultural heritage, visit Britannica’s Lavash Article.
Q&A
Q&A: Mastering Lavash – Your Step-by-Step Bread Recipe Guide
Q1: What is lavash, and why is it special?
A: Lavash is a traditional soft, thin flatbread originating from Armenia and widely enjoyed throughout the Caucasus and Middle East. Its delicate texture and flexibility make it perfect for wraps, sandwiches, or simply dipping in your favourite spreads. What makes lavash truly special is its simplicity-just a handful of basic ingredients transformed by technique and tradition into something irresistible.
Q2: What ingredients do I need to make authentic lavash at home?
A: The beauty of lavash lies in its minimalism. You’ll need all-purpose flour, water, salt, and a bit of yeast or sometimes baking powder depending on the recipe variation. No need for fancy additives-just quality ingredients and the right technique.
Q3: How important is kneading in the lavash-making process?
A: Kneading is crucial! It develops the gluten network, giving lavash its characteristic elasticity and softness. Aim for a smooth, slightly tacky dough. The process not only improves texture but also helps the dough become easier to roll out paper-thin without tearing.
Q4: What’s the best way to roll out lavash dough?
A: Roll patiently! Use a lightly floured surface and a rolling pin to stretch the dough as thin as possible-think almost translucent. If the dough resists, let it rest for a few minutes to relax the gluten. Thinness is key to achieving that authentic, delicate lavash texture.
Q5: Can lavash be baked in a regular oven, or does it require a special oven?
A: While traditional lavash is baked in a tandoor or on a saj (a convex griddle), you can certainly bake it in a regular oven or on a hot cast-iron skillet at home. Your oven or skillet should be very hot to achieve those signature blistered spots and slightly crispy edges.
Q6: What makes lavash different from other flatbreads like tortillas or pita?
A: lavash is typically thinner and softer than pita or tortillas, and it ofen comes in large sheets rather than smaller rounds. Unlike pita, it doesn’t puff up to form pockets. Its thinness makes it incredibly versatile, lending itself beautifully to rolling, folding, or layering.
Q7: How should I store lavash to keep it fresh?
A: Wrap cooled lavash tightly in plastic wrap or place it in an airtight container. Stored at room temperature,it’ll stay soft for a couple of days. For longer storage, freeze it-just thaw and warm before use to restore that fresh-baked softness.
Q8: What are some creative ways to enjoy lavash once it’s made?
A: Lavash is a blank canvas! Use it for veggie-packed wraps, roll it up with hummus and grilled vegetables, or cut it into strips and bake into crispy chips for dipping. You can even layer it with cheese and herbs to create a delicious lavash “pizza” adaptable to any taste.
Q9: Do I need any special tools to master lavash at home?
A: Not at all! A rolling pin, mixing bowl, and a hot skillet or baking sheet will do the trick. If you want to get fancy, a baking stone can help mimic traditional stone oven heat, but it’s not necessary to achieve tasty results.
Q10: Any tips for beginners struggling to get the perfect thinness without tearing?
A: Patience and practice are your best friends. If the dough snaps back or tears,let it rest 10-15 minutes to relax gluten.Work gently, and don’t worry if your first attempts are a bit thicker or uneven. Each batch is a step closer to lavash mastery!
With these insights, you’re well on your way to becoming a lavash artisan-embracing a centuries-old tradition and bringing its warmth to your very own kitchen table.Enjoy the journey, and savor every tender, flaky bite!
Final Thoughts
As the last golden bubble rises and your homemade lavash rests on the counter, you’ve not only baked bread-you’ve unlocked a centuries-old tradition, one thin, flexible sheet at a time.Mastering lavash is more than following a recipe; it’s about embracing the delicate dance between flour, water, and fire, and celebrating the art of simplicity turned remarkable.Whether you roll it, wrap it, or pair it with your favorite fillings, this bread connects you to cultures and kitchens far beyond your own. So, next time you pull a fresh lavash from the oven, remember: you’re holding a timeless story, ready to unfold with every bite. Happy baking,and may your journey with lavash continue to rise!