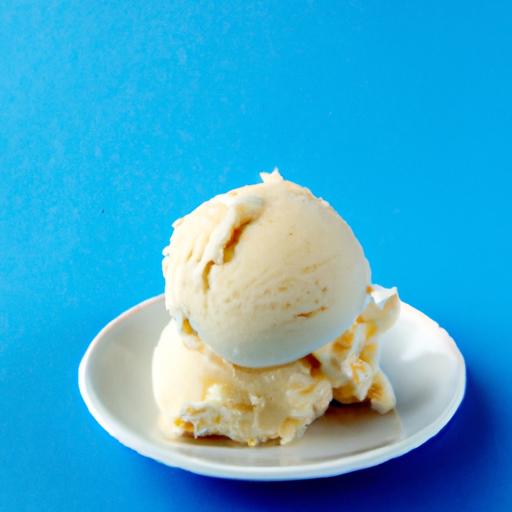

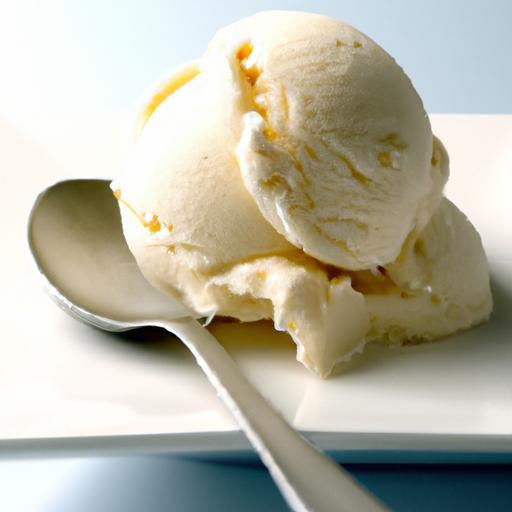
There’s somthing undeniably magical about the first taste of velvety vanilla ice cream-a timeless classic that dances effortlessly between simplicity and indulgence. In “Creamy Bliss: Your Guide to Homemade Vanilla Ice Cream,” we invite you to embark on a tasty journey that transforms everyday ingredients into a luscious, melt-in-your-mouth treat. Weather you’re a seasoned cook or a curious beginner, this guide will unlock the secrets to creating your vrey own creamy vanilla masterpiece, perfectly tailored to your taste buds. Get ready to scoop into a world where comfort meets craft, and homemade ice cream becomes an art form in your own kitchen.
Selecting the Perfect Vanilla Beans for Maximum Flavour
When crafting homemade vanilla ice cream, the quality of your vanilla beans sets the tone for every luscious bite. Choosing the right vanilla beans means unlocking layers of rich, aromatic flavor-those deep, creamy notes that only real beans can deliver.
Opt for Madagascar Bourbon vanilla beans if you desire the classic warm, sweet profile known for its creamy depth. These beans often come plump and moist with a supple texture, which means they are bursting with flavorful seeds. Alternatively, Tahitian vanilla beans offer a fruity and floral twist, perfect for a unique variation on the conventional.
Look for beans that are slightly oily to the touch and deep brown-almost black-in color. Avoid brittle or dry beans as they will impart less flavor. When you split open the pod longitudinally, you should see densely packed, sticky black seeds ready to infuse your custard base with unmistakable vanilla intensity.
Mastering the Art of Custard Base for Silky Smooth Texture
At the heart of every perfect ice cream is a custard base, and mastering this technique is essential for achieving a creamy bliss texture that melts on your tongue. The balance of egg yolks, sugar, and cream creates an emulsion that lends richness and elasticity.
Start by gently whisking egg yolks and sugar until pale and slightly thickened-a sign that enough air has been incorporated. Warm your cream infused with vanilla bean seeds and the scraped pod until just simmering, then gradually temper the eggs by slowly adding the hot cream while stirring continuously. This prevents curdling and keeps the custard silky smooth.
Cook the custard over low heat, stirring constantly until it thickens enough to coat the back of a spoon. Be patient; rushing this step can scramble the eggs and ruin the texture. Strain the custard through a fine sieve to catch any cooked bits for the purest velvet finish.
Churning techniques to Achieve Creamy Perfection
Once your custard is completely cooled, churning brings that custard to life, transforming it into creamy vanilla ice cream where every spoonful becomes an experience in creamy bliss. If you’re using an ice cream maker, make sure the bowl is fully frozen beforehand to maximize freezing efficiency.
Pour the custard base slowly into the churner and let the machine work its magic. Stirring consistently incorporates air that lightens the texture without creating icy crystals. The ice cream is ready when it thickens to a soft-serve consistency, usually after 20-30 minutes depending on your machine.
For an even richer mouthfeel, freeze the churned ice cream for an additional 3-4 hours to allow it to firm up while retaining that creamy smoothness.
Creative Twists and toppings to Elevate Your vanilla Ice Cream Experience
While classic vanilla beans bring the star quality,you can create your own creamy bliss by layering creative flavors and textures with playful toppings. Try folding in crushed toasted almonds or swirls of luscious caramel sauce for contrast.
Fresh berries such as raspberries or blueberries add bursts of tartness that brighten the creaminess. For a decadent finish, sprinkle flaky sea salt or drizzle high-quality dark chocolate, enhancing the complexity of your dessert.
For an elegant presentation, serve scoops in chilled bowls garnished with edible flowers or a sprig of fresh mint, making your homemade vanilla ice cream as visually stunning as it is indeed delicious.
Prep and Cook Time
- Preparation: 30 minutes
- Infusing and Chilling: 4 hours
- Churning: 30 minutes
- Freezing: 3-4 hours
Yield
Serves 6 generous scoops
Difficulty Level
Medium – Requires attention to detail but very rewarding
Ingredients
- 2 cups heavy cream
- 1 cup whole milk
- 3/4 cup granulated sugar
- 5 large egg yolks
- 1 Madagascar Bourbon vanilla bean, split and seeds scraped
- Pinch of salt
Instructions
- Prepare vanilla infusion: In a medium saucepan, combine cream, milk, vanilla bean seeds, and pod. Warm over medium heat until just simmering. Remove from heat and let steep for 15 minutes to fully infuse.
- Whisk egg yolks and sugar: In a separate bowl, vigorously whisk the egg yolks with sugar until the mixture is pale and thickened.
- temper the eggs: Slowly pour the warm cream mixture into the egg yolks,whisking constantly to prevent curdling.
- Cook the custard: Return the mixture to the saucepan and cook over low heat, stirring constantly with a wooden spoon until the custard thickly coats the back of the spoon (about 170°F or 77°C).remove from heat immediately.
- Strain the custard: Pour through a fine-mesh sieve into a clean bowl to remove the vanilla pod and any cooked egg bits.
- Chill: Cover with plastic wrap pressed directly on the surface and refrigerate until completely cold, at least 4 hours or overnight.
- Churn: Pour chilled custard base into your ice cream maker and churn according to manufacturer’s instructions until it reaches soft-serve texture.
- Freeze: Transfer the ice cream to an airtight container and freeze for 3-4 hours to firm up before serving.
Tips for Success
- Use fresh,high-quality eggs for a rich,creamy custard and to avoid off flavors.
- Infusing the custard base overnight intensifies vanilla aroma.
- never rush cooking the custard-constant stirring prevents scrambling and ensures smoothness.
- If you don’t have an ice cream maker, pour the base into a shallow dish and stir vigorously every 30 minutes while freezing to break up ice crystals.
- Store ice cream in a container with a tight lid to prevent ice crystals and odor absorption.
Serving Suggestions
- Scoop into chilled glass bowls or vintage coupe glasses for a classic look.
- Top with freshly sliced strawberries and a sprig of fresh mint for a shining, herbaceous contrast.
- Drizzle with homemade salted caramel sauce or bittersweet chocolate ganache for decadent depth.
- Sprinkle toasted chopped pistachios or crushed biscotti for crunch and texture.
| Nutritional Info (per scoop) | Calories | Protein | Carbs | Fat |
|---|---|---|---|---|
| Vanilla Ice Cream | 210 kcal | 3g | 18g | 14g |
Try our caramel sauce recipe to pair with your vanilla ice cream for an irresistible combo.
for more inspiration on vanilla varieties and the science behind ice cream making,visit The National Coffee Association’s vanilla guide.

Q&A
Q&A: Creamy Bliss – Your guide to Homemade vanilla ice Cream
Q1: What makes homemade vanilla ice cream different from store-bought?
A: Homemade vanilla ice cream boasts a freshness and creaminess that’s hard to beat. Without preservatives or stabilizers, it captures the pure essence of vanilla and rich dairy, delivering a texture that’s luxuriously smooth and a flavor that feels truly handcrafted.
Q2: What are the essential ingredients for making vanilla ice cream at home?
A: The heart of any great vanilla ice cream is simple: whole milk, heavy cream, sugar, egg yolks, and real vanilla.Using quality vanilla beans or pure vanilla extract elevates the flavor, while the eggs create a custardy base that makes the texture silky.
Q3: Is it possible to make vanilla ice cream without an ice cream maker?
A: Absolutely! While an ice cream maker simplifies the churning process, you can achieve delicious results by freezing your custard and stirring it vigorously every 30 minutes until it reaches a creamy consistency. This method helps prevent large ice crystals from forming.
Q4: How do I ensure my vanilla ice cream has a perfectly smooth texture?
A: The key lies in tempering your eggs and slowly cooking the custard base to the right temperature, typically around 170°F (77°C).Then, chilling the mixture thoroughly before churning helps maintain creaminess. Churning evenly incorporates air, resulting in that dreamy spoonful everyone loves.
Q5: Can I customize my vanilla ice cream with mix-ins or swirls?
A: Definitely! Vanilla ice cream is a versatile canvas. once your ice cream is partially churned,fold in chocolate chips,fresh berries,caramel ribbons,or toasted nuts for added texture and flavor surprises.Just remember to add mix-ins gently to keep the creamy consistency intact.
Q6: How should I store homemade vanilla ice cream to keep it fresh?
A: Store your ice cream in an airtight container, pressing a piece of parchment paper directly on the surface before sealing. This simple step prevents ice crystals from forming and keeps that creamy texture intact. For best flavor, enjoy within two weeks.
Q7: Any tips for making vanilla ice cream extra flavorful?
A: Infuse your cream with vanilla beans by gently heating them with the cream before mixing.For an extra layer of depth, try adding a tiny pinch of salt or a splash of pure vanilla extract after cooking the custard. These subtle touches can elevate your ice cream from delicious to unforgettable.
Q8: What’s the best way to serve homemade vanilla ice cream?
A: Serve it simply to let its creamy richness shine-perhaps in a crisp sugar cone or a chilled bowl. It also pairs beautifully with fresh fruit, warm desserts like apple crisp, or decadent chocolate sauce. The classic vanilla base makes it the perfect partner for countless treats.
Unveiling the secrets behind creamy bliss, your homemade vanilla ice cream journey is sure to be a delicious adventure-one spoonful at a time!
The way Forward
As the rich, velvety scoops of your homemade vanilla ice cream melt on your tongue, you’ll realize that creamy bliss isn’t just a dessert-it’s a celebration of simplicity, craft, and comfort. Armed with this guide, you’re no longer just a consumer but a creator, turning humble ingredients into a timeless delight that invites endless variations and memories. So next time the craving strikes, remember: the perfect scoop is just a whisk and a chill away, waiting to transform your kitchen into a haven of sweet satisfaction. Here’s to your delicious journey into the world of homemade vanilla ice cream-where every bite is a moment of pure, creamy joy.