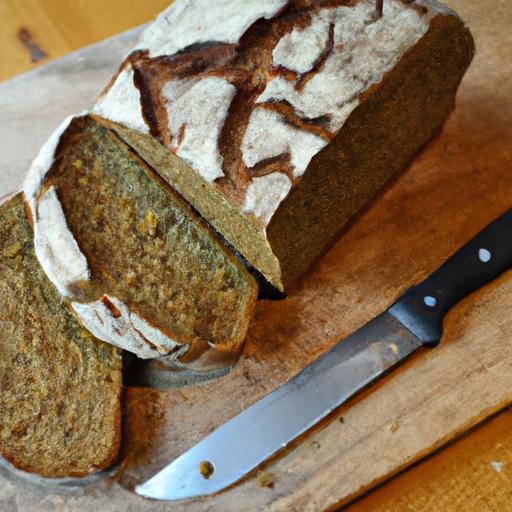


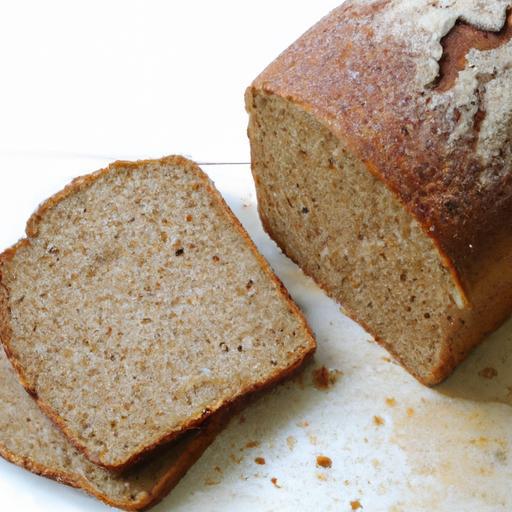
There’s something deeply comforting about the warm, fragrant aroma of freshly baked Boston brown bread wafting through your kitchen-an invitation to slow down adn savor a timeless American classic. Rooted in New England tradition and beloved for its dense,moist texture and subtly sweet flavor,Boston brown bread is more than just a side dish; it’s a culinary heritage wrapped in a soft,molasses-kissed crumb. Whether you’re a seasoned baker looking to expand your repertoire or a curious foodie eager to explore authentic flavors, this ultimate guide will walk you through every step of baking classic Boston brown bread at home. From selecting the perfect ingredients to mastering the steaming technique that gives this bread its signature tenderness, get ready to bring a slice of history-and homemade goodness-straight from your oven to your table.
Ultimate Guide to Baking Classic boston Brown Bread at Home begins with choosing ingredients that capture the soul of this beloved New England staple. This bread’s warm,nutty essence and moist crumb owe their magic to carefully selected flours and sweeteners,reflecting its colonial origins when simple pantry staples transformed into comfort on a plate.
Prep and cook Time
- Planning: 15 minutes
- Steaming: 4 hours
- Total Time: 4 hours 15 minutes
Yield
- one 9-inch loaf, serving 8
Difficulty Level
- Medium – requires attention to conventional steaming and ingredient balance
Ingredients
- 1 cup rye flour (preferably fresh-ground for intense flavor)
- 1 cup whole wheat flour (sifted for a lighter crumb)
- ½ cup cornmeal (adds texture and authenticity)
- ½ cup dark molasses (for rich sweetness and depth)
- 1 cup buttermilk (room temperature to activate the leavening)
- 1 large egg, beaten (binds ingredients for moist texture)
- 1 teaspoon baking soda (traditional leavening agent)
- ½ teaspoon salt (enhances overall flavor)
- 2 tablespoons melted unsalted butter (adds richness and tender crumb)
- Optional: ¼ cup toasted chopped walnuts or raisins (for a pleasant surprise in texture and sweetness)
Instructions
- prepare your steaming vessel: Traditionally, Boston brown bread is steamed in a greased, narrow, cylindrical mold or a loaf pan tightly wrapped with parchment to keep moisture in. Line the container with parchment and grease it lightly.
- Mix dry ingredients: In a large bowl, combine rye flour, whole wheat flour, cornmeal, baking soda, and salt. Whisk thoroughly to evenly distribute the leavening and salt for consistent rise.
- Combine wet ingredients: In a separate bowl, whisk together the molasses, buttermilk, beaten egg, and melted butter until fully blended.
- Incorporate wet into dry: Pour the wet mixture into the dry ingredients. Stir gently but completely to form a thick batter. Avoid overmixing; a few small lumps are fine.
- Add optional nuts or raisins: Fold them evenly into the batter for added texture and a traditional touch.
- Transfer batter to prepared mold: Fill the loaf pan or traditional steaming mold about ¾ full to allow for expansion.
- Prepare the steamer: Set up a large pot with a steamer rack or place a small rack at the bottom and add boiling water to just below the rack. Place the batter mold inside, cover the top of the mold with foil, then cover the pot with a tight-fitting lid to trap steam.
- Steam the bread: Maintain a steady simmer and steam for 4 hours.Check water level every hour, replenishing hot water as necessary to prevent drying out the pot.
- cool before unmolding: Once done, carefully remove the mold and allow bread to cool in the mold for 10-15 minutes. This rest helps the bread firm up and easier slicing.
Tips for Success
- Ingredient Selection: opt for high-quality rye and whole wheat flours for an authentic flavor. Freshly milled rye flour gives a pronounced earthiness that elevates the final bread.
- Steaming Technique: Do not rush the steaming process-slow, consistent steam is paramount to achieving the trademark moist, dense yet tender crumb.
- Rest Time: resist the urge to slice hot bread. Resting allows the crumb to set properly and develop its characteristic texture.
- Variations: Swap walnuts for chopped dried cranberries or figs for a seasonal twist.
- Make-ahead: Boston brown bread keeps beautifully wrapped in the fridge up to a week and even freezes well for up to 3 months. Simply re-steam slices before serving to revive moistened slice texture.
Creative Serving Suggestions
- Serve thick slices warm with a pat of creamy butter and a drizzle of apple butter or honey for traditional New England charm.
- Pair with smoked cheddar or sharp vermont cheese and fresh pear slices for a refined contrast.
- Use toasted slices as a base for savory open-faced sandwiches topped with roast turkey, cranberry sauce, and a sprinkling of fresh thyme.
- For breakfast, enjoy with a drizzle of maple syrup and a side of cinnamon spiced baked apples to brighten the deep flavor of the bread.
- Garnish plates with fresh parsley or a sprig of rosemary to add a fresh herbal note and vibrant visual appeal.
| Nutrient | Per Serving (1 slice) |
|---|---|
| Calories | 185 |
| Protein | 5 g |
| Carbohydrates | 34 g |
| Fat | 4 g |

Explore more about traditional New England breads to deepen your baking repertoire. for further reading on the history and cultural importance of Boston brown bread, visit Encyclopedia Britannica.
Q&A
Q&A: Ultimate Guide to Baking Classic Boston Brown Bread at Home
Q1: What exactly is Boston Brown Bread?
A1: Boston Brown bread is a moist, dense, and slightly sweet bread traditionally steamed rather than baked. It’s a quintessential new england specialty that combines rye, cornmeal, and wheat flours with molasses and sometimes a hint of rye whiskey or coffee for that deep, rich flavor.
Q2: Why should I try making Boston Brown Bread at home?
A2: Besides its comforting, old-world charm, baking this bread at home lets you control the ingredients and customize flavors. Plus, steaming bread is a fun, rewarding twist on traditional baking, resulting in a tender crumb and unique texture that pairs perfectly with butter and baked beans.
Q3: Is steaming bread challenging?
A3: Not at all! Steaming Boston Brown Bread is surprisingly straightforward. With a sturdy pudding mold, a large pot with a steamer rack, and a bit of patience, you can create a wonderfully moist loaf without the dryness or crust typical of oven baking.
Q4: What ingredients are essential for authentic Boston Brown Bread?
A4: The classics include rye flour, cornmeal, whole wheat flour, baking soda, salt, molasses, buttermilk, and sometimes a splash of black coffee. Each ingredient layers flavor and texture, creating that signature sweet, earthy taste.
Q5: Can I make Boston Brown Bread gluten-free?
A5: You can experiment by substituting the flours with gluten-free alternatives, but keep in mind that the traditional texture relies heavily on rye and wheat flours. You might get a different crumb or density, but it could still be tasty!
Q6: How long dose the steaming process take?
A6: Typically, Boston Brown Bread needs about 2 to 3 hours of steaming. The long, slow steam makes it tender and moist, so set your timer and resist peeking too often-good things come to those who wait!
Q7: How do I know when the bread is done?
A7: You can insert a skewer or toothpick into the center. If it comes out clean or with just a few crumbs, your bread is ready. The loaf should be firm but springy to the touch.
Q8: What’s the best way to serve Boston brown Bread?
A8: This bread shines alongside classic New england baked beans, a pat of butter, or even cream cheese and jam for breakfast. Leftovers are excellent toasted or sliced for a rustic sandwich.
Q9: Can I freeze Boston Brown Bread?
A9: Absolutely! Wrap it tightly in plastic wrap and foil, then freeze. Thaw it gently and warm it slightly before serving to restore that fresh-steamed softness.
Q10: any tips for a triumphant bake?
A10: Use a well-fitting lid or foil for your steaming pot to keep the moisture in, don’t rush the steaming time, and be sure to grease your mold to release the bread easily. Most importantly, enjoy the process-your kitchen will smell incredible, and the reward is worth every minute!
The Conclusion
Baking classic Boston Brown Bread at home is more than just preparing a delicious treat-it’s a journey into a rich culinary tradition that warms both the kitchen and the heart. With this ultimate guide, you now have the tools and tips to master every step, from mixing the perfect batter to steaming that iconic tender loaf. So next time you crave a slice of New England comfort, roll up your sleeves, fire up your oven, and let the slow, sweet aroma of Boston brown Bread fill your home. Because some classics aren’t just meant to be enjoyed-they’re meant to be made with your own hands.Happy baking!